Removal and Replacement
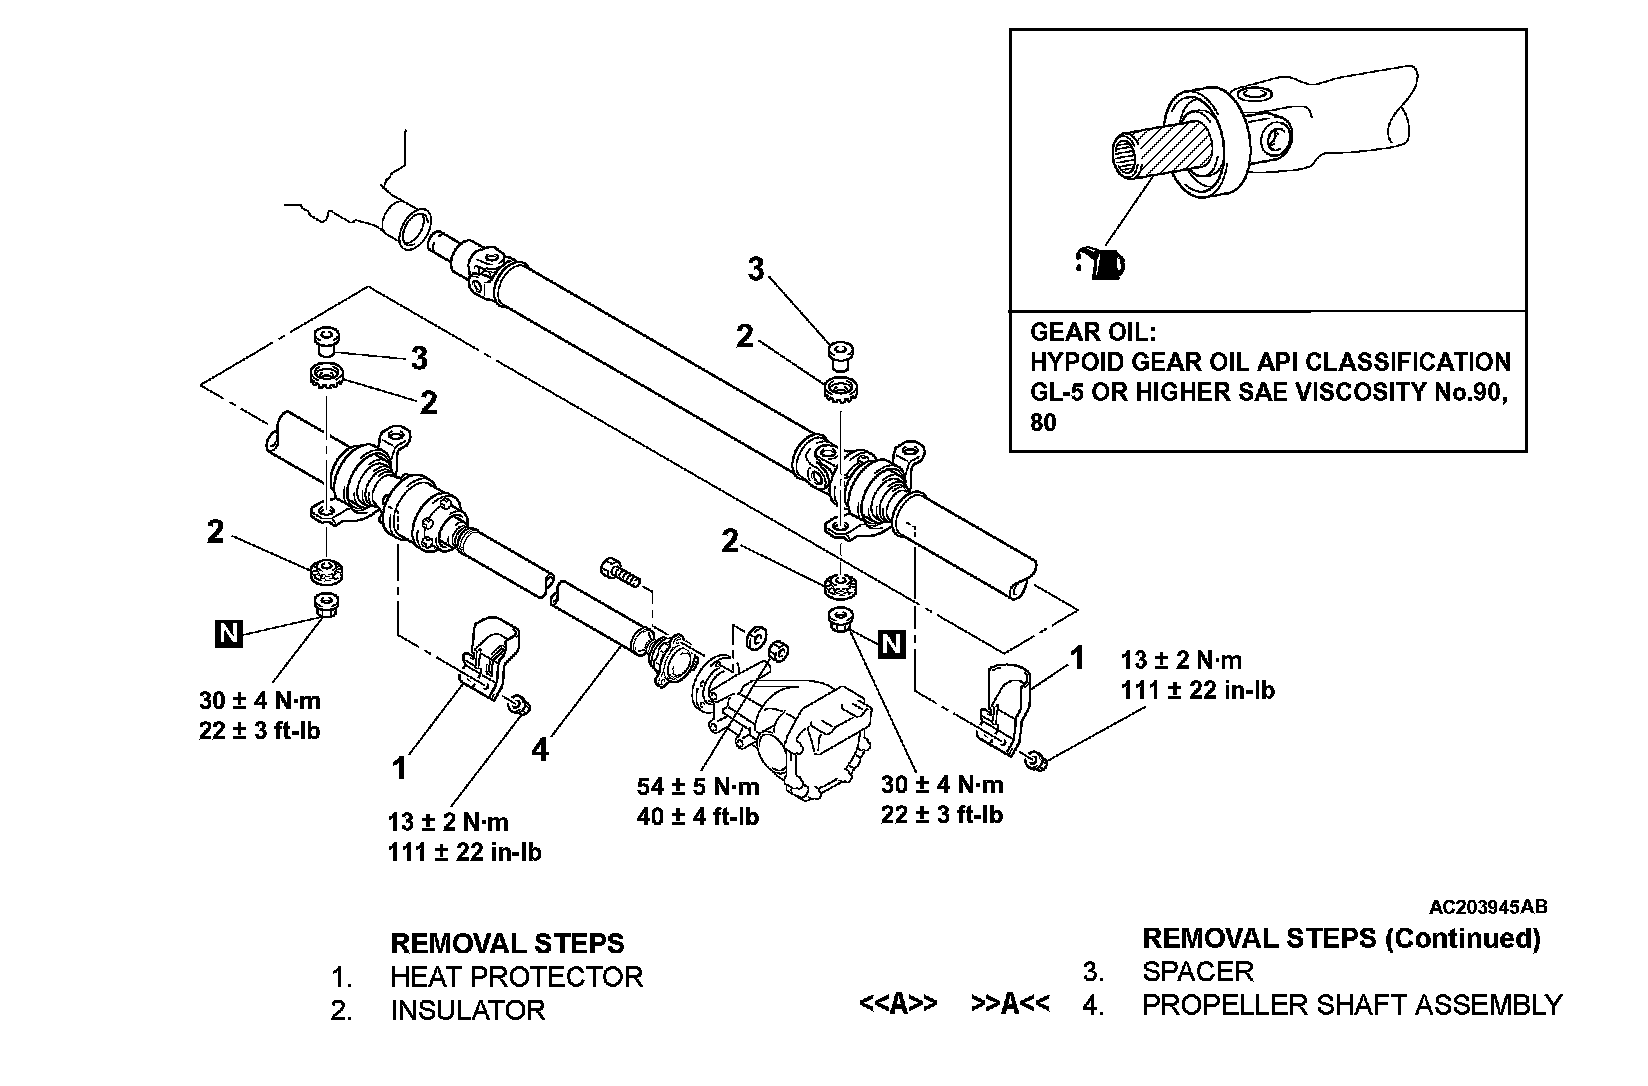
PROPELLER SHAFT
REMOVAL AND INSTALLATION
REMOVAL SERVICE POINT
<> PROPELLER SHAFT ASSEMBLY REMOVAL
1. Make mating marks on the differential companion flange and the propeller shaft assembly.
CAUTION: Be careful not to bend the joint portion when removing the propeller shaft because this will damage to the joint boot.
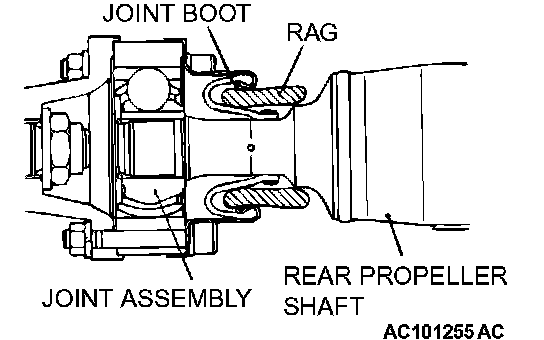
2. Insert a rag so as to avoid boot damage, and remove the propeller shaft assembly in a straight and level manner.
INSTALLATION SERVICE POINT
>>A<< PROPELLER SHAFT ASSEMBLY INSTALLATION
CAUTION:
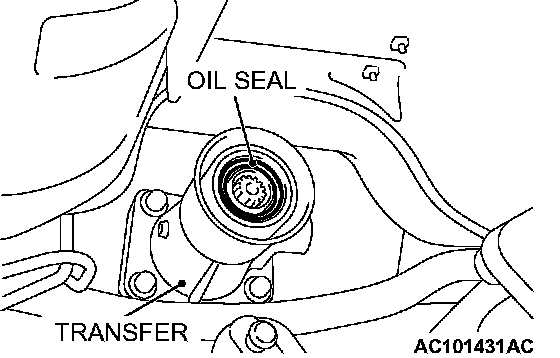
^ Do not damage the oil seal lips on the transfer case.
^ Remove oil and grease from the threads of the mounting bolts and nuts before tightening, or they will loosen.
^ Be careful not to bend the joint portion when removing the propeller shaft, because this will damage the joint boot.
1. If reusing the propeller shaft, align the mating marks of differential companion flange and propeller shaft assembly to install.
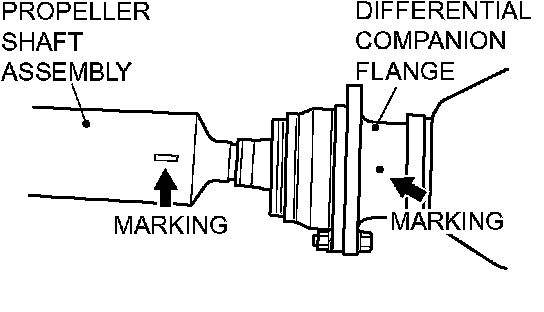
2. When installing a new rear propeller shaft assembly, align the mark on the propeller shaft tube with the mark at the side of the differential companion flange.
INSPECTION
^ Check the sleeve yoke and center yoke for wear, damage or cracks.
^ Check the propeller shaft for bends, twisting or damage.
^ Check the universal joint for smooth operation in all directions.
^ Check the center bearing for smooth movement.
PROPELLER SHAFT RUNOUT
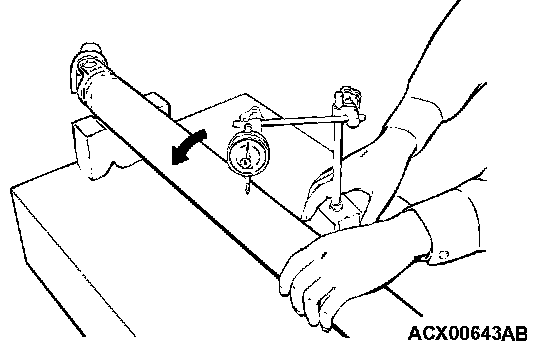
Limit: 0.6 mm (0.02 inch)