Overhaul
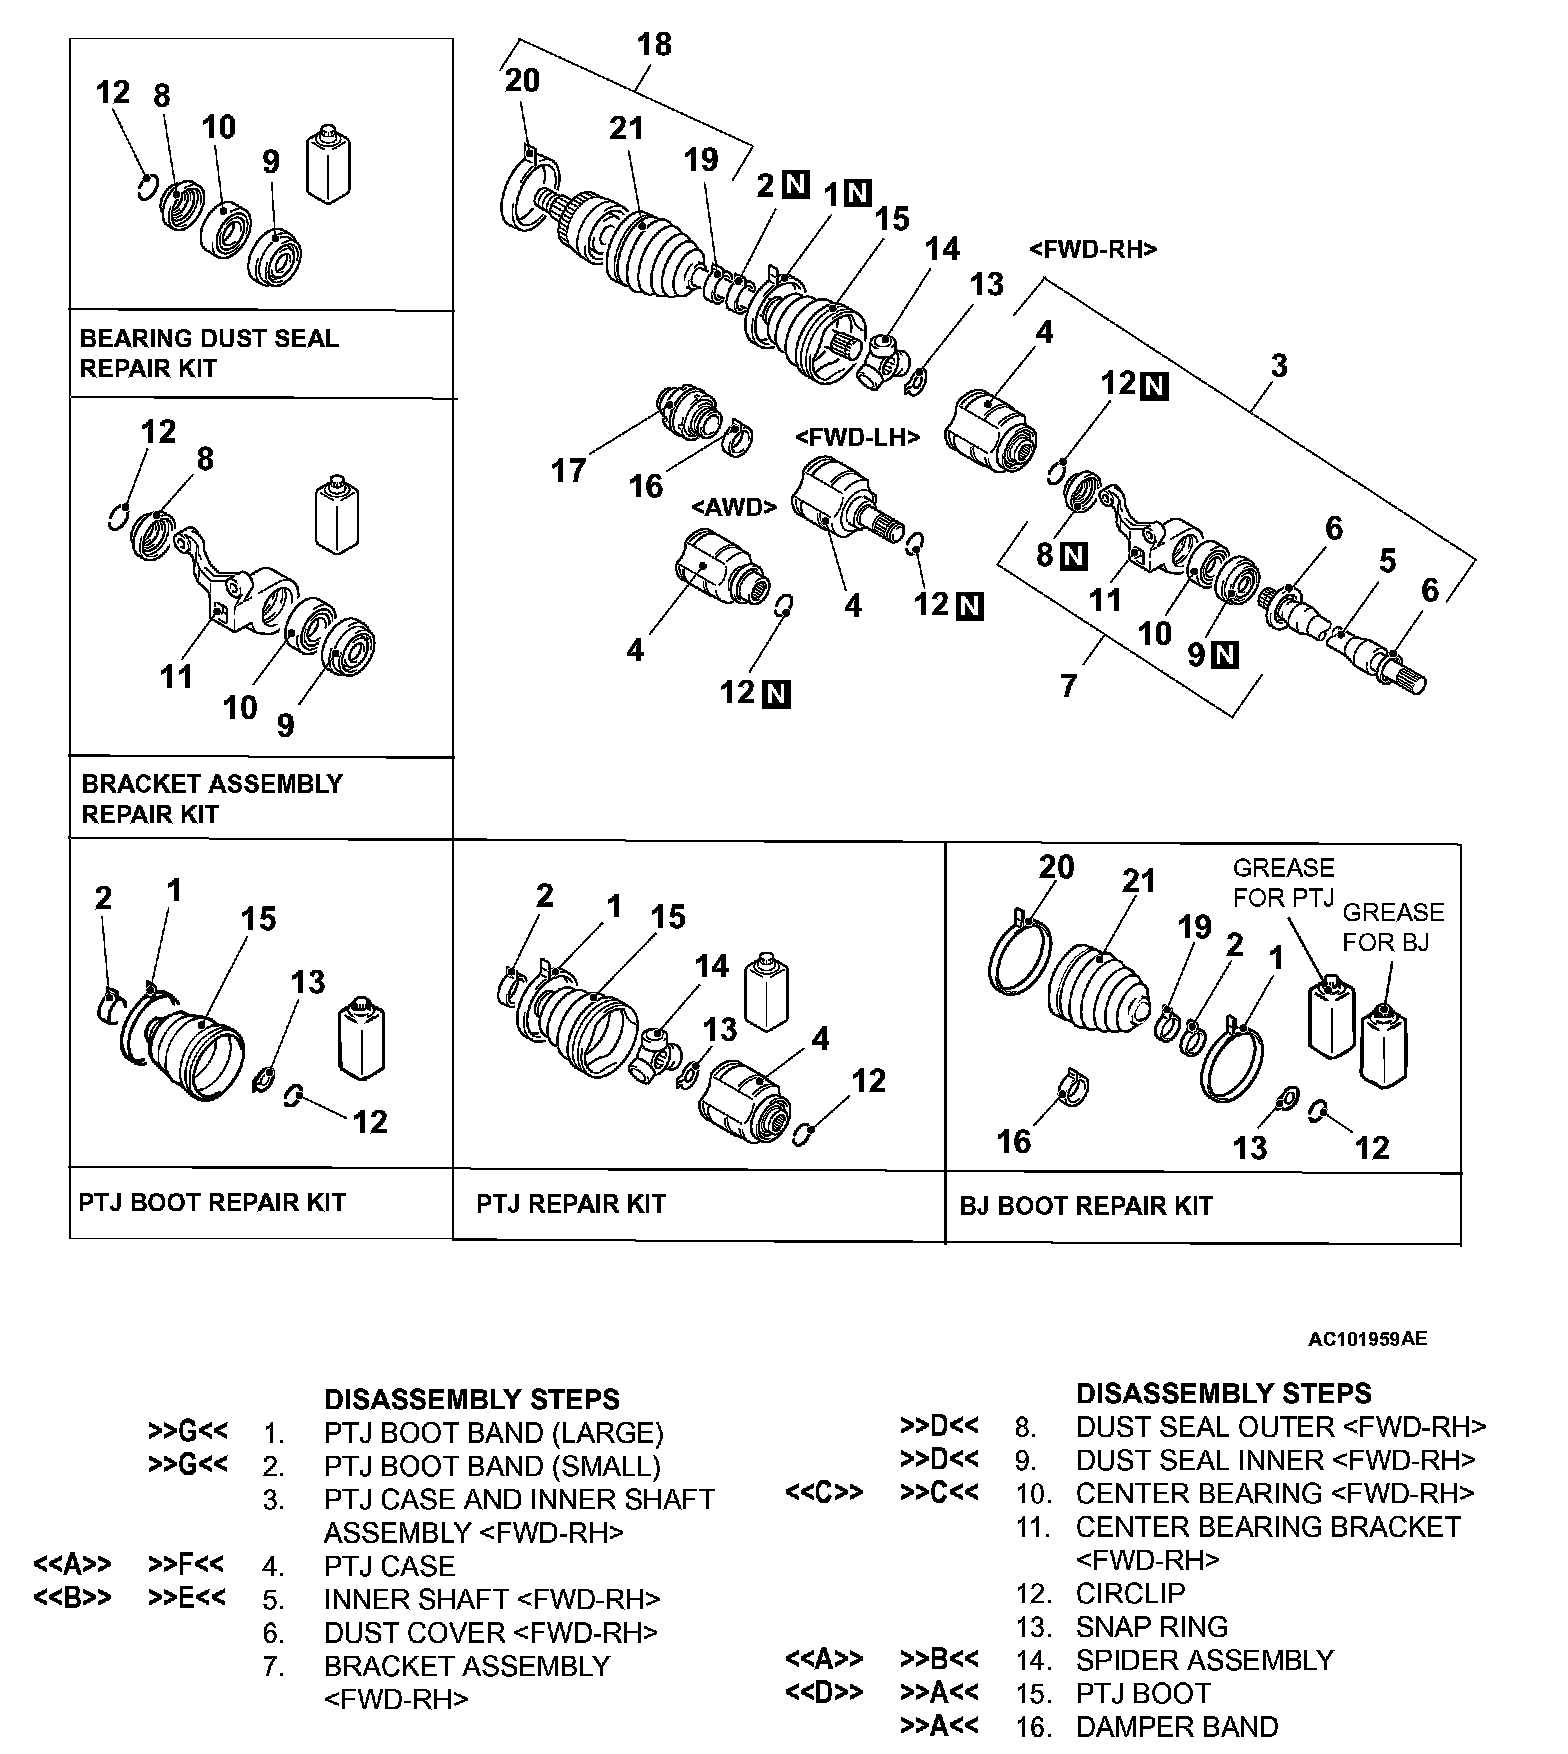
DISASSEMBLY AND ASSEMBLY
CAUTION:
^ For vehicles with ABS, be careful not to damage the ABS rotor, which is attached to the BJ outer race during disassembly and reassembly.
^ Never disassemble the BJ assembly except when replacing the BJ boot.
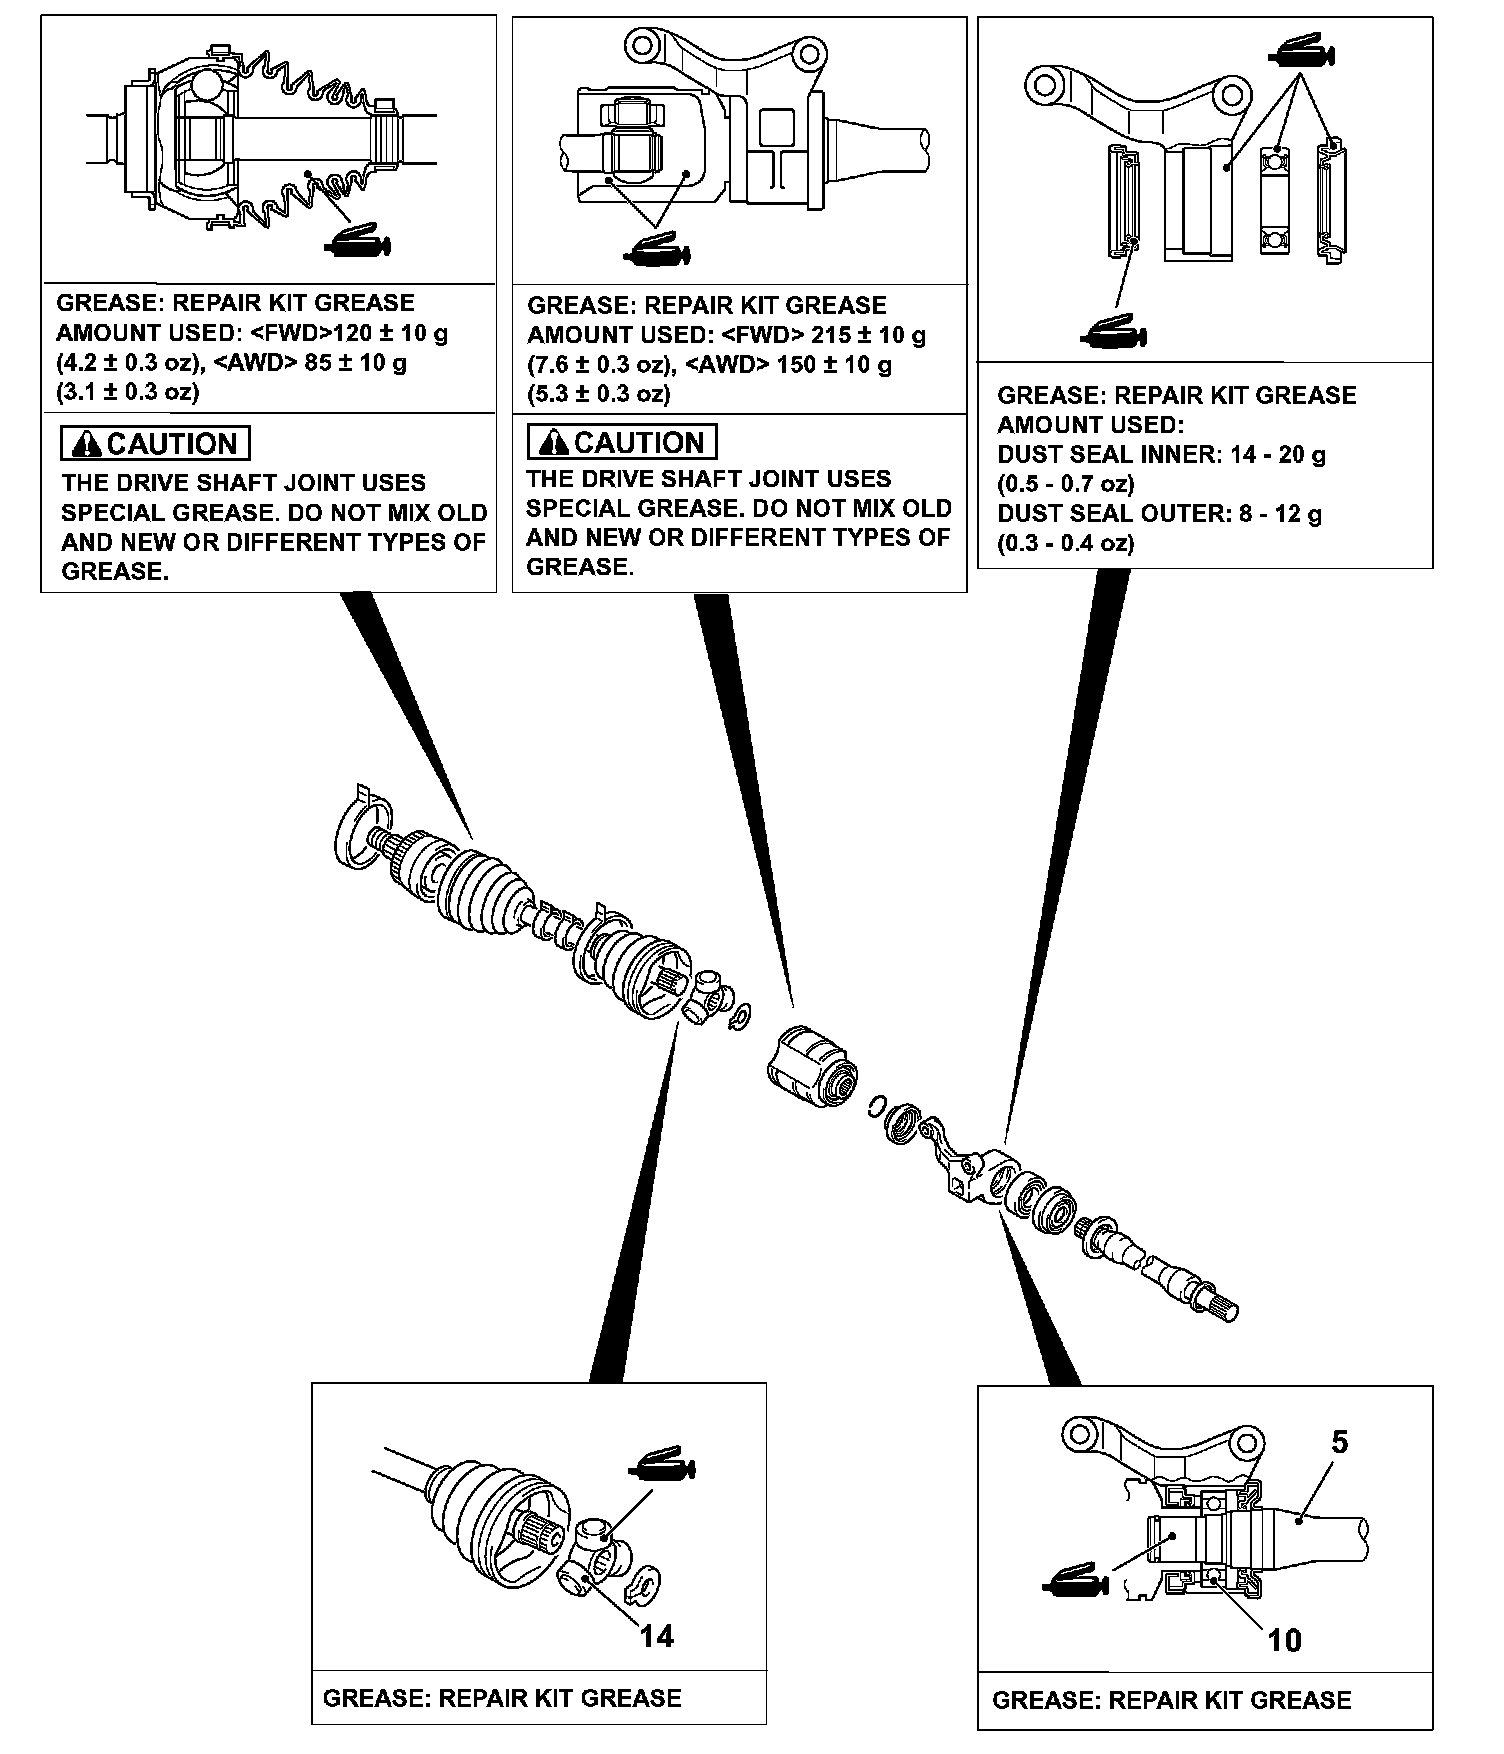
LUBRICATION POINTS
DISASSEMBLY SERVICE POINTS
<> PTJ CASE/SPIDER ASSEMBLY REMOVAL
CAUTION: Do not disassemble the spider assembly.
1. Wipe off grease from the spider assembly and the inside of the PTJ case.
2. Always clean the spider assembly when the grease contains water or foreign material.
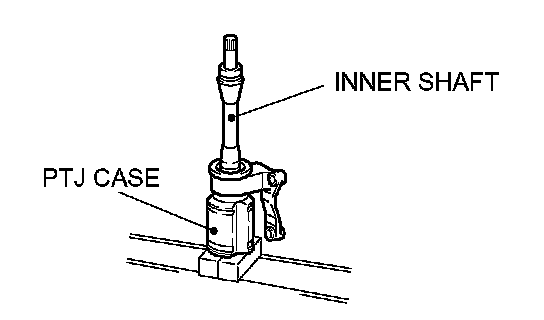
<> INNER SHAFT
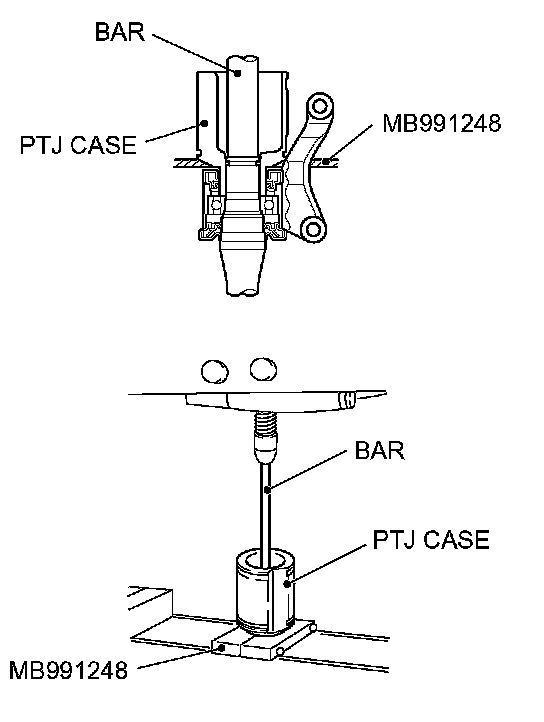
1. Use special tool MB991248 to remove the inner shaft assembly from the PTJ case.
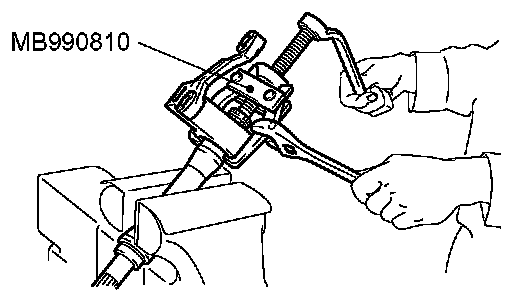
2. Use special tool MB990810 to remove the center bearing bracket from the inner shaft.
<
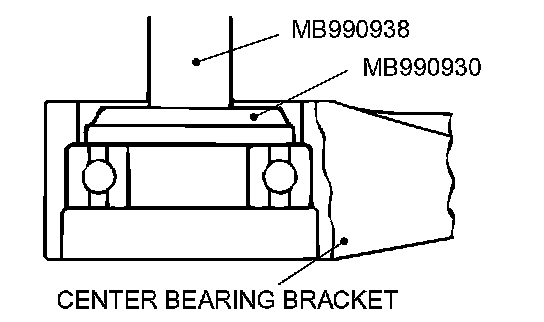
Use special tools MB990938 and MB990930 to remove the center bearing from the center bearing bracket.
<
1. Wipe off grease from the shaft spline.
2. When reusing the PTJ boot, wrap plastic tape around the shaft spline to avoid damaging the boot.
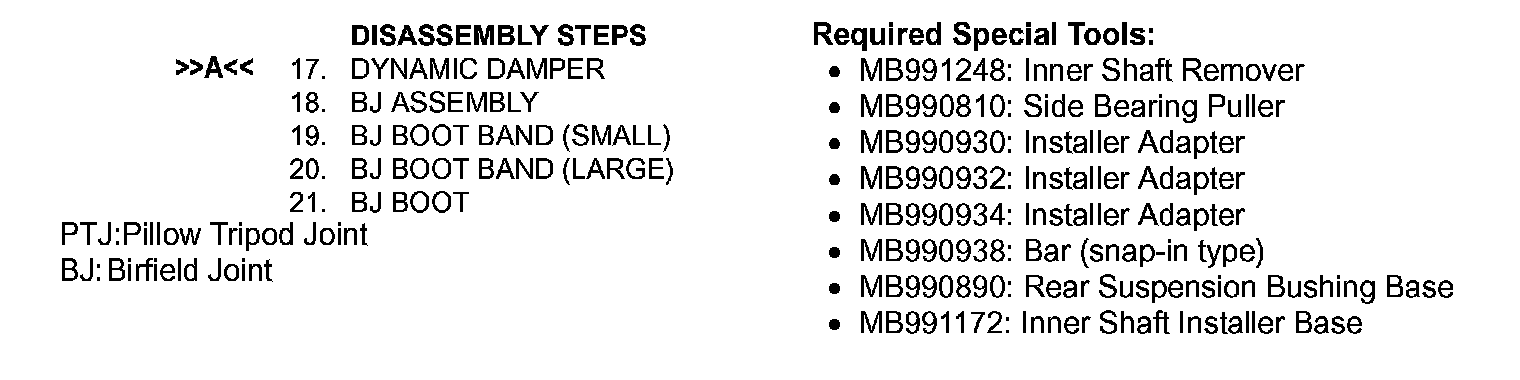
ASSEMBLY SERVICE POINTS
>>A<< DYNAMIC DAMPER/DAMPER BAND/PTJ BOOT INSTALLATION
CAUTION: There should be no grease adhered to the rubber part of the dynamic damper.
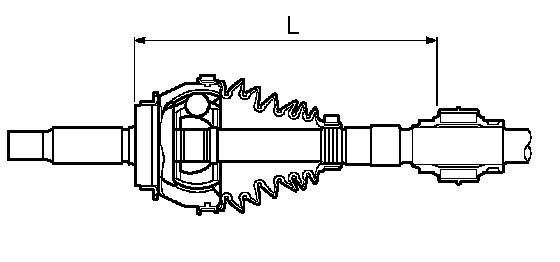
1. Install the dynamic damper in the position (L) shown in the illustration.
L: 237 ± 3 mm (9.3 ± 0.12 in)
2. Secure the damper bands.
3. Wrap plastic tape around the shaft spline, and then install the PTJ boot band (small) and PTJ boot.
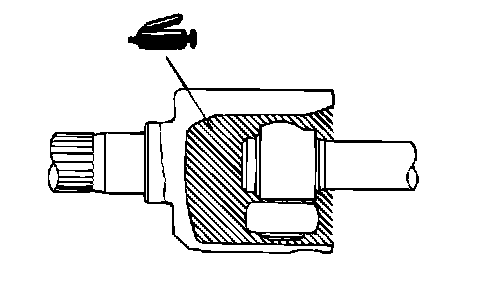
>>B<< SPIDER ASSEMBLY INSTALLATION
CAUTION:
^ The drive shaft joint use special grease. Do not mix old and new or different types of grease.
^ If the spider assembly has been cleaned, take special care to apply the specified grease.
1. Apply the specified grease furnished in the repair kit to the spider assembly between the spider axle and the roller.
Specified grease: Repair kit grease
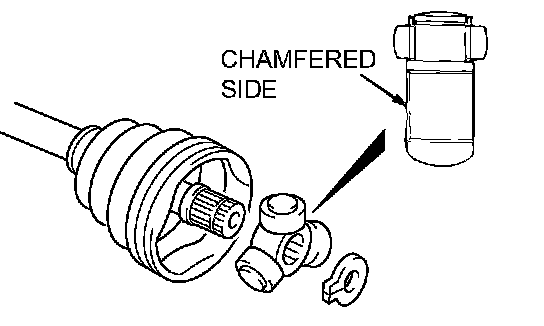
2. Install the spider assembly to the shaft from the direction of the spline chamfered side.
>>C<< CENTER BEARING
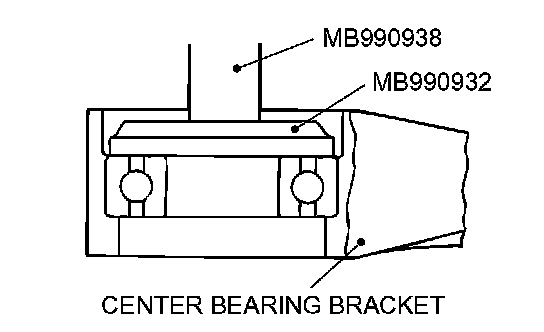
Use special tools MB990938 and MB990932 to press-fit the center bearing into the center bearing bracket.
>>D<< DUST SEAL INNER
CAUTION: When applying grease, make sure that it does not adhere to anything outside the lip.
1. Apply the specified grease to the rear surface of all dust seals.
Specified grease: Repair kit grease
Amount used: Dust seal inner: 14 - 20 g (0.5 - 0.7 ounce)
Amount used: Dust seal outer: 8 - 12 g (0.3 - 0.4 ounce)
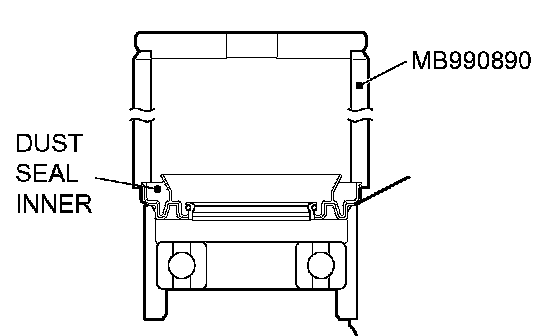
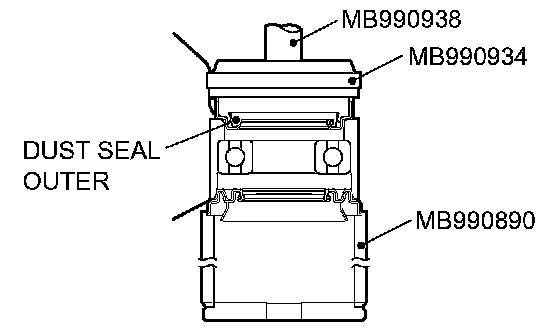
2. Use special tools MB990890, MB990938, and MB990934 to press the dust seals into the center bearing bracket until they are flush with each other.
3. Apply repair kit grease to the lip of each dust seal.
>>E<< INNER SHAFT
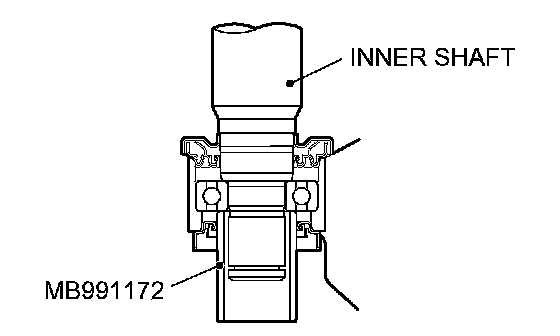
1. Use special tool MB991172 to hold the center bearing inner race, and then press-in the inner shaft.
2. Apply repair kit grease to the inner shaft spline, then press fit it into the PTJ case.
NOTE: When press-fitting the inner shaft into the PTJ case, apply a thin coat of repair kit grease to the dust seal outer lip part and the outside edge of the PTJ axial part.
>>F<< PTJ CASE INSTALLATION
CAUTION: The drive shaft joint use special grease. Do not mix old and new or different types of grease.
After applying the specified grease to the PTJ case, insert the drive shaft and apply grease one more time.
Specified grease: Repair kit grease
Amount to use:
Amount to use:
NOTE: The grease in the repair kit should be divided in half for use, respectively, at the joint and inside the boot.
>>G<< PTJ BOOT BAND (SMALL)/PTJ BOOT BAND (LARGE) INSTALLATION
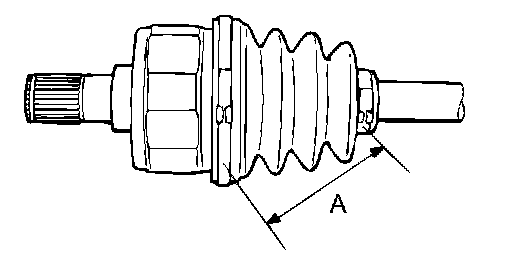
Set the PTJ boot bands at the specified distance in order to adjust the amount of air inside the PTJ boot, and then tighten the PTJ boot band (small), PTJ boot band (large) securely.
Standard value (A):
INSPECTION
^ Check the drive shaft for damage, bending or corrosion.
^ Check the inner shaft for damage, bending or corrosion.
^ Check the output shaft for damage, bending or corrosion.
^ Check the drive shaft spline part for wear or damage.
^ Check the inner shaft spline part for wear or damage.
^ Check the output shaft spline part for wear or damage.
^ Check the spider assembly for roller rotation, wear or corrosion.
^ Check the groove inside PTJ case for wear or corrosion.
^ Check the dynamic damper for damage or cracking.
^ Check the boots for deterioration, damage or cracking.
^ Check the center bearing for seizure, discoloration or roughness of rolling surface.
^ Check the dust cover for damage or deterioration.