Inspection
INSPECTION^ Check the bushings for wear and deterioration.
^ Check the stabilizer bar for deterioration or damage.
^ Check all bolts for condition and straightness.
STABILIZER LINK BALL JOINT TURNING TORQUE CHECK
Required Special Tool:
^ MB990326: Preload Socket
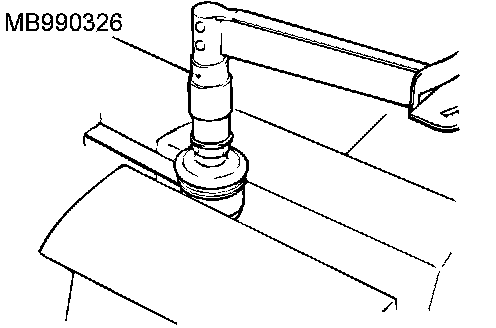
1. After shaking the ball joint stud several times, install the nut to the stud and use the special tool MB990326 to measure the turning torque of the ball joint.
Standard value: 1.7 - 3.1 Nm (15.1 - 27.4 inch lbs.)
2. If the measured value exceeds the standard value, replace the stabilizer link.
3. If the measured value is lower than the standard value, check that the ball joint turns smoothly without excessive play. If so, it is possible to re-use that ball joint.
STABILIZER LINK BALL JOINT DUST COVER CHECK
1. Check the dust cover for cracks or damage by pushing it with your finger.
2. If the dust cover is cracked or damaged, replace the stabilizer link.
NOTE: Cracks or damage of the dust cover may cause damage to the ball joint. When it is damaged during service work, replace the dust cover.
STABILIZER LINK BALL JOINT DUST COVER REPLACEMENT
Only when the dust cover is damaged accidentally during service work, replace the dust cover as follows:
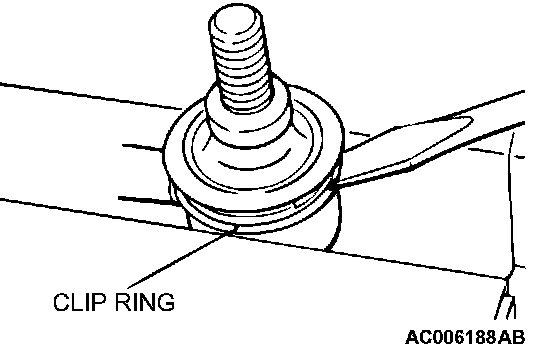
1. Remove the clip ring and the dust cover.
2. Apply the multipurpose grease SAE J310, NLGI No.2 or equivalent to the inside of a new dust cover.
3. Wrap plastic tape around the stabilizer link stud, and then install the dust cover to the stabilizer link.
4. Secure the dust cover by the clip ring.
5. Check the dust cover for cracks or damage by pushing it with finger.